
Many a gamer has tried to squeeze the very last drop out of his rig and from there take the obvious step toward getting two GPUs working in SLI.
NVIDIA has closely viewed the mainstream SLI support scenario in recent times, but then again, enthusiasts still employed this application to play older games or push frame rates higher in supported titles.
The trick, however, is knowing how to configure SLI settings properly.
Enter NVIDIA Profile Inspector, a small but very useful tool that will help unlock hidden driver-level options that are perfect for fine-tuning SLI settings.
This guide will teach you how to use it to configure SLI settings for multi-GPU rendering without drowning you in jargon.
Configure SLI Settings Like a Pro with NVIDIA Profile Inspector
Step 1: Get NVIDIA Profile Inspector
- Search for NVIDIA Profile Inspector online and download the latest version.
- Extract the zip file; you don’t need to install it.
- Open nvidiaProfileInspector.exe.
Don’t sweat it when you first enter the interface; it does look intimidating. Think of it as a car dashboard with extra buttons most people don’t even use at all.
You don’t need to learn every reason because we’re only going to focus on the SLI-related ones.
Step 2: Choose the Right Game Profile
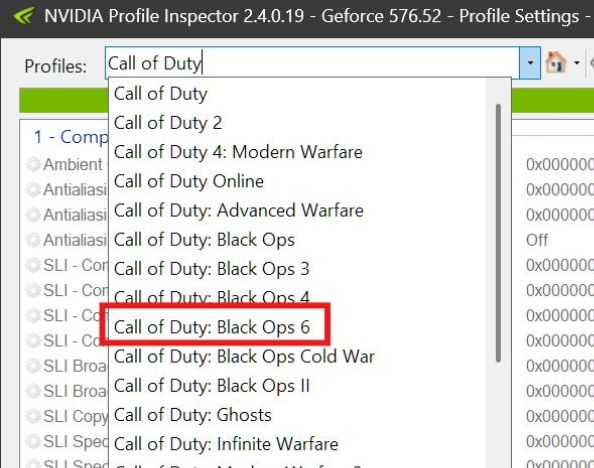
At the very top, there’s a drop-down menu filled with hundreds of games.
- If your game is listed → select it.
- If your game isn’t listed → click the profile button and create a new one. Then, link the profile to your game’s .exe file so the driver knows when to apply these settings.
Your changes won’t take effect when you open the game if you don’t connect to the correct “.exe“.
Step 3: Locate the SLI Settings
Now scroll down until you hit the SLI section. This is where the magic happens. You’ll find options like:
- SLI Rendering Mode – Decides how the workload is split between GPUs.
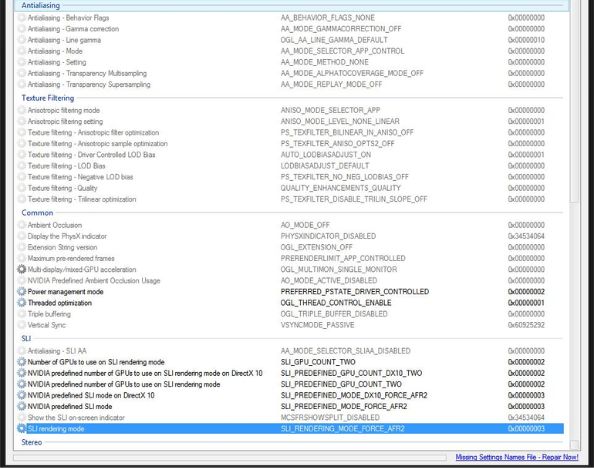
- SLI Compatibility Bits – Critical for making SLI actually scale in certain games.
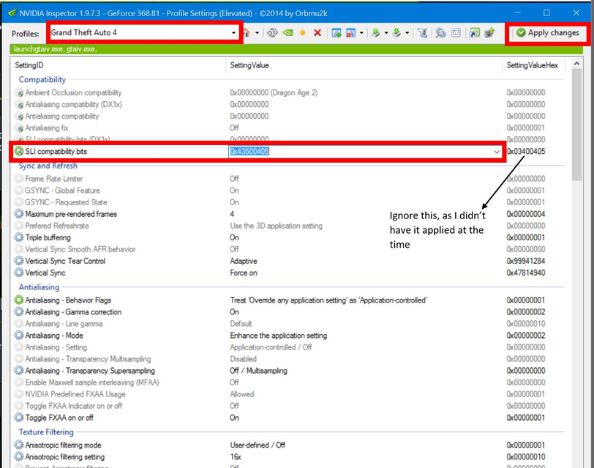
- SLI Broadcast Bits (DX9, DX10, DX11) – Tied to how the game engine communicates across multiple GPUs.
At first sight, these titles might intimidate. Not to be worried, because most of us will touch only two of them: Rendering Mode and Compatibility Bits.
Step 4: Pick Your Rendering Mode
Here’s the breakdown:
- AFR (Alternate Frame Rendering): Each GPU takes turns rendering frames. This usually gives the best scaling and is the most common choice.
- SFR (Split Frame Rendering): Each frame is divided between GPUs. Less common, but worth trying if AFR doesn’t behave.
I found that both GPUs scaled more smoothly when I tried AFR on The Witcher 3. However, SFR caused me to micro-stutter, so game-specific outcomes are undoubtedly different.
Step 5: Apply Compatibility Bits
This part can sound intimidating, but here’s the simple version:
- Compatibility bits are pre-set codes that tell your GPUs how to cooperate in specific games.
- Without those bits, there will be no proper scale in some games, even if using AFR. The best way to find the proper bits would be to look them up, both shared by the community, to gather working settings for different games.
Compatibility bits can be considered “unlock codes” to make SLI possible in games that do not natively support it very well.
Step 6: Save and Test
Once you’ve set your rendering mode and (if needed) added compatibility bits:
- Click the green checkmark in the top-right corner (“Apply Changes”).
- Launch your game.
- Check with either MSI Afterburner or GPU-Z to see if the second GPU is deployed.
If you see GPU usage on both cards, congratulations, your SLI setup is right on track!
A Few Words of Caution
- Not every modern game supports SLI anymore. Don’t be discouraged if performance doesn’t improve; it may just be the game.
- Be patient. Finding the right compatibility bits sometimes feels like detective work.
- Always test stability. Crashes or artifacts usually mean you need to adjust your settings.
Final Thoughts
Configuring SLI settings through Profile Inspector tends to feel a little like tweaking under the hood, and will require patience, the right tools, and a little willingness to potentially fail.
For me, the payoff came when I saw my older games hitting smooth 100+ FPS thanks to both GPUs pulling their weight.
So, dust out that old dual-GPU setup, install Profile Inspector, and give it a shot. Just a few changes here and there may bring your rig back to life.